One day my aunt asked me if I could make her old HP LaserJet 1000 printer work with Windows 10 Home Edition. I came to her, plugged the printer into her laptop and saw the famous USB device not recognized error. I googled the problem to only find that support for the driver ended with Windows XP and there’s no drivers for this printer model since Vista. All solutions I’ve seen used either Windows 7 32bit with XP compatibility mode (not my case) or a Virtual machine (VM) with Windows XP shared printer (my guess is it still won’t work due to driver is unavailable, see below). The problem is the laptop runs on a Celeron processor and has 4GB of memory and Windows 10 is already too slow, so a VM is not an option.
So the task is: a simple setup for a non-technical person who only needs to switch on the printer, print some pages and switch it off.
The solution is pretty obvious: a print server. One option is to buy one, assuming you can find the one you need and make it work. I prefer to keep as much as possible under my control and, since I’ve already had success with turning my HP LaserJet P1005 into a network printer, I went with the second option and decided to make a custom print server.
I took the printer home and made it work with Linux without any problems.
NB: Windows 10 has a Windows Subsystem for Linux and installing the below steps might work there. Still, it uses some kind of a VM machine to run Linux so it isn’t an option either.
I settled down to the next setup:
- Raspberry Pi 3 Model B
- Raspbery Pi 3 case
- Micro USB 5V-2.1A power adapter
- Micro SD card class 10 8GB
- RJ45 Patch Cable
- AC Extension cord with 2+ plugs
NB: Some people may argue that spending $70 on the above setup is not feasible to make a $20 printer work. But I think the device that works for more than 20 years has earned a second life chance.
Let’s go to work…
Perform the Generic Print Server Setup from here.
Setup HP LaserJet 1000
- Plug-in and switch on the printer
- List available firmware files
$ sudo getweb ... $ ./getweb 1000 # Get HP LJ 1000 firmware file ... - Get HP LaserJet 1000 firmware file
$ sudo getweb 1000 - Restart the printer
- In the browser go to CUPS admin page
- Ensure Allow users to cancel any job (not just their own) is checked.
- Click Add Printer
- Choose Local Printers: HP LaserJet 1000 (HP LaserJet 1000)
- Click Continue
- Enable Share This Printer
- Click Continue
- Choose Model: HP LaserJet 1000 Foomatic/foo2xqx (recommended) (en)
- Click Add Printer
- Click Set Default Options
- Click Maintenance and then Print Test Page
- Store the printer link: http://printerpi:631/printers/HP_LaserJet_1000
That’s it! The print server is now accessible via IPP and Samba.
Testing on Windows 10
It’s time to test the print server on some Windows 10 machine.
I used a free Windows 10 Enterprise image from here.
Ensure the print server is reachable:
   > ping printerpi

   Pinging printerpi [192.168.100.32] with 32 bytes of data:
   Reply from 192.168.100.32: bytes=32 time<1ms TTL=127
   ...
Connect to the printer via IPP
Ensure Internet Printing Client feature is enabled.
Run Turn Windows features on or off (optionalfeatures.exe). The Internet Printing Client option should be enabled.
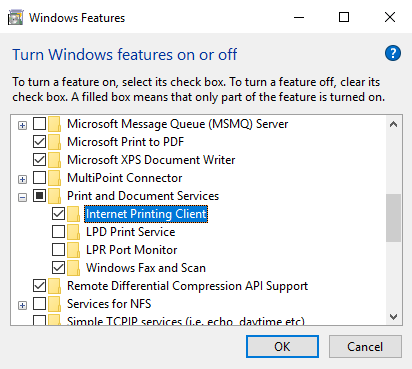
Adjust as you need. Click OK. You may need to restart.
If you prefer command line then launch PowerShell as Administrator and run:
> Enable-WindowsOptionalFeature -FeatureName Printing-Foundation-Features -Online -NoRestart
> Enable-WindowsOptionalFeature -FeatureName Printing-Foundation-InternetPrinting-Client -Online -NoRestart
> Enable-WindowsOptionalFeature -FeatureName FaxServicesClientPackage -Online -NoRestart
> Disable-WindowsOptionalFeature -FeatureName Printing-Foundation-LPDPrintService -Online -NoRestart
> Disable-WindowsOptionalFeature -FeatureName Printing-Foundation-LPRPortMonitor -Online -NoRestart
Adjust the above you need. You may need to restart.
Let’s connect to the printer via IPP.
Go to Windows -> Settings -> Devices -> Printers & scanners -> Add a printer or scanner.
If the printer is found you are done. Click on it, print the test page and you can stop reading.
NB: I don’t know how to make automatic printer discovery work. It works on some machines and doesn’t on others. I’ve spent huge amount of time playing with services, firewall, googled about it and no luck. If you know how to make it work reliably, please share.
If the printer is not found click The printer that I want isn’t listed. Choose Select a shared printer by name and past the printer link into the field.
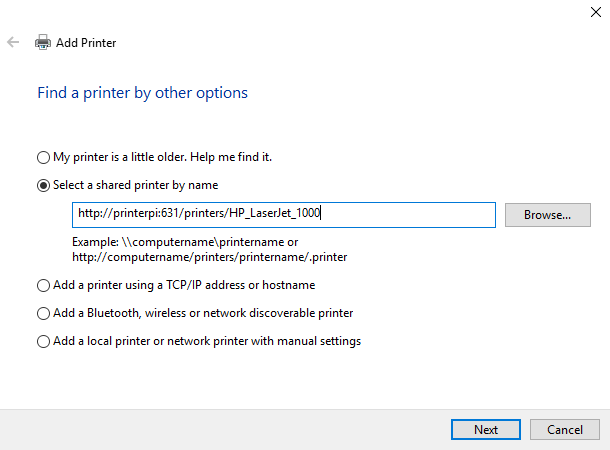
Click Next.
What?! Windows wants the driver, which we don’t have. We wouldn’t be doing all of that otherwise. Fortunately, there’s a solution. Thanks to this article (in Russian) for the hint. CUPS takes printing jobs in PostScript and converts it into a format suitable for the printer. Windows includes two such drivers: MS Publisher Color Printer (color) and MS Publisher Imagesetter (black and write). You won’t have full control over the printer and printing will be slower, but this is a working solution.
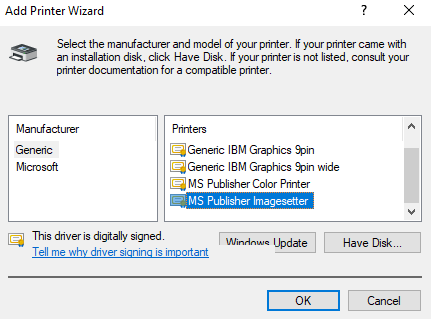
Choose MS Publisher Imagesetter and click OK.
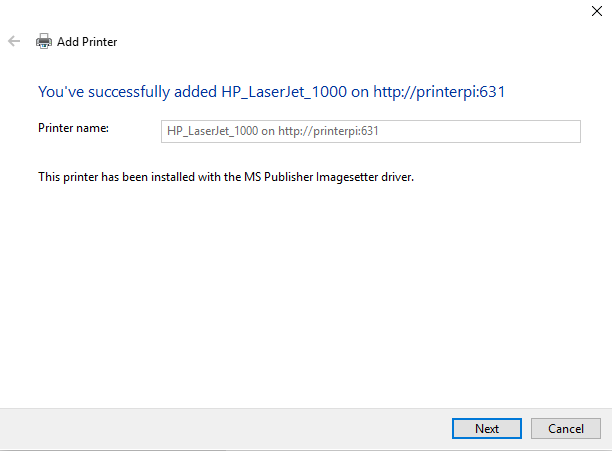
Click Next. Click Print a test page.
At this point you should be able to print the test page and you can stop reading.
Connect to the printer via Samba
NB: Support for SMBv1 is long deprecated in Windows. It’s not secure, but I think using the client only at home is acceptable. Plus it might be the only option for an old network printer or a NAS server. See this link for more detail.
Ensure SMB 1.0/CIFS Client is enabled
Run Turn Windows features on or off (optionalfeatures.exe). The SMB 1.0/CIFS Client option should be enabled.
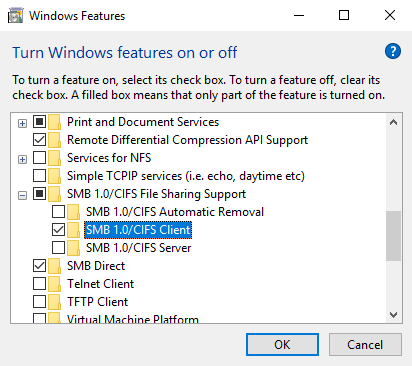
Adjust as you need. Click OK. You may need to restart.
If you prefer command line then launch PowerShell as Administrator and run:
> Enable-WindowsOptionalFeature -FeatureName SMB1Protocol -Online -NoRestart
> Enable-WindowsOptionalFeature -FeatureName SMB1Protocol-Client -Online -NoRestart
> Disable-WindowsOptionalFeature -FeatureName SMB1Protocol-Server -Online -NoRestart
> Disable-WindowsOptionalFeature -FeatureName SMB1Protocol-Deprecation -Online -NoRestart
Adjust the above you need.
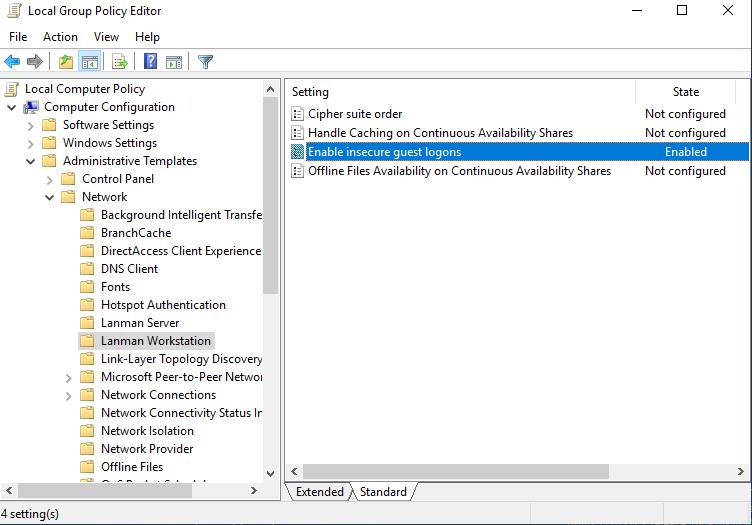
Enable Samba Insecure Guest Logons
On Windows 10 Enterprise and Professional you can run Local Group Policy Editor (gpedit.msc)
On Windows 10 Home you need to change the Windows Registry.
Launch PowerShell as Administrator and run:
> Set-ItemProperty -Path "HKLM:\SYSTEM\CurrentControlSet\Services\LanmanWorkstation\Parameters" AllowInsecureGuestAuth -Type DWORD -Value 1 -Force
Now restart Windows.
Let’s connect to the printer via Samba:
Run File Explorer -> Network. Press F5 to refresh.
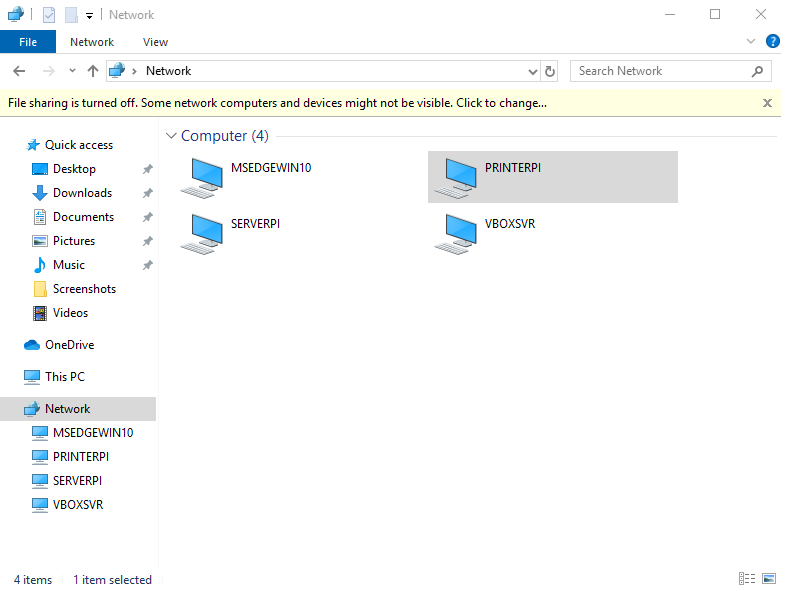
Double-click on PRINTERPI. Double-click on HP_LasetJet_1000.
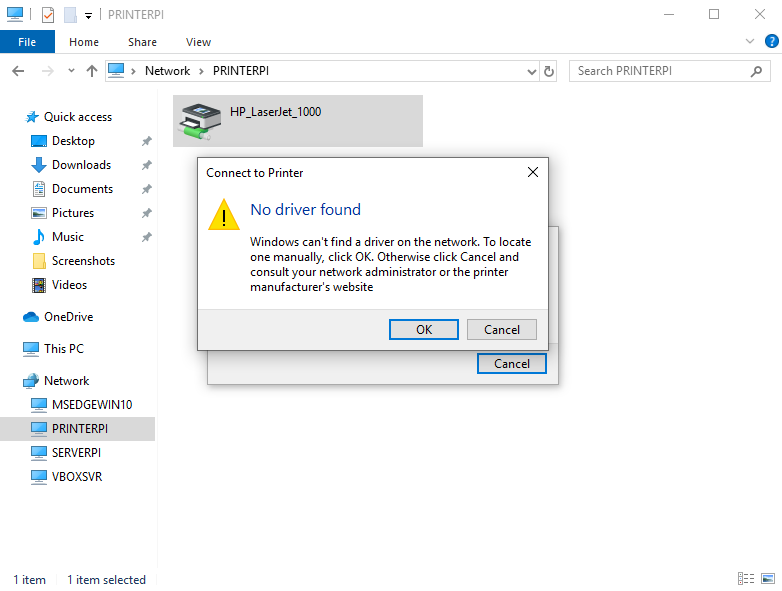
Windows again wants the driver, which we don’t have. But see the explanation above… Click OK.
Choose MS Publisher Imagesetter and click OK.
Now you’ve connected to the printer via Samba too.
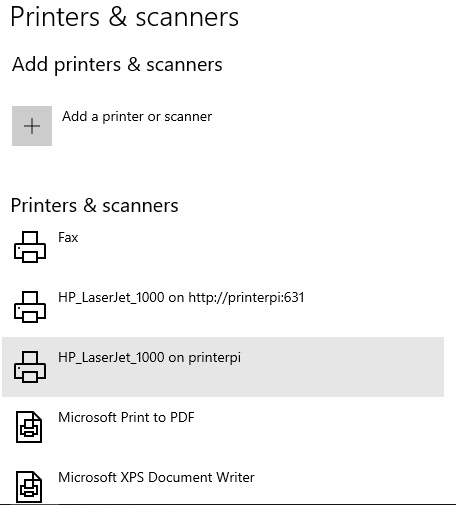
Choose HP_LaserJet_1000 on PRINTERPI -> Manage -> Print a test page.
Congratulations! The old HP LaserJet 1000 now works with Windows 10 via IPP and Samba.